
How To
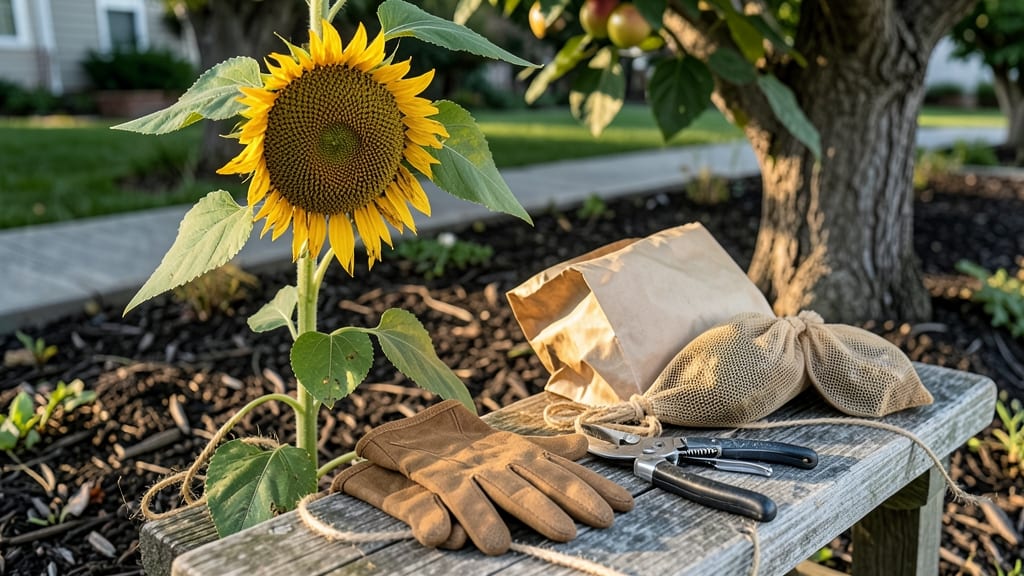
Harvesting sunflower heads for seeds at the right time means the difference between a bountiful stash and a wasted effort.
Picture this: you’ve nurtured your 🌻 sunflowers all season, only to watch the seeds scatter before you can save them—or worse, harvest too early and end up with soft, moldy messes.
The key? Timing it perfectly when the petals brown, the back turns papery, and the seeds rattle like a tiny drum.
Most gardeners miss the window because they focus on the wrong cues—like seed color alone. But there’s more to it: weather plays a role, too. A sudden rainstorm can ruin days of waiting, and birds will clean up any seeds left too long on the stalk.
That’s why knowing the three non-negotiable signs of readiness is your secret weapon.
Below, I’ll break down exactly what to look for, how to test seed maturity with a simple shake, and the best way to store your harvest so it stays viable for years. No guesswork—just actionable steps to turn your sunflowers into next year’s garden gold.


3 Key visual signs your sunflower heads are ready for seed harvesting
Harvesting sunflower seeds at the right time makes all the difference between viable seeds and wasted effort. Too early, and you’ll pull soft, unusable seeds that won’t germinate.
Too late, and birds or rain will ruin your hard work. The key lies in watching for these three visual cues that signal peak seed readiness.
First, focus on the petals. When they turn completely brown and droop, it’s your first green light. This shift means the plant is redirecting energy toward seed maturation. Ignoring this sign often leads to poor germination rates because seeds haven’t fully developed.
Next, examine the back of the seed head. It should turn a rich, yellow-brown color. This indicates the seeds inside are drying out naturally. A green or partially yellow back means seeds are still too moist and won’t store well.
Finally, give your sunflower head a gentle shake. If you hear a loud rattling sound, seeds are loose and ready. No sound? They’re still attached too tightly, and the head isn’t fully mature.
-
1. Brown, Wilted Petals
Petals turn fully brown and droop completely. This signals the plant’s energy shifts to seed production. Test: Gently tug a petal—if it snaps off easily, it’s ready. -
2. Yellow-Brown Seed Head
The back of the head changes from green to dry yellow-brown. Press lightly—it should feel papery, not spongy. Warning: Rain can reverse this drying process! -
3. Loud Rattle When Shaken
Shake the head over a paper bag. A loud, clear rattle means seeds are loose and ready. No sound? Wait 2–3 more days for full maturity.
The 'squeeze test' is my go-to method for confirming readiness. Hold the seed head firmly and apply gentle pressure. If the seeds inside feel dry and crumbly (like stale cereal), they’re perfect for harvesting. If they’re still firm or sticky, wait a few more days.
Why does this matter? Seeds harvested too early often fail to germinate because they’re not fully developed. Overripe seeds, on the other hand, can shatter or attract pests. Striking the balance ensures you collect seeds with the highest viability and storage life.
Pro tip: Harvest on a dry, sunny day to prevent mold. Cut the stem at a 45-degree angle about 6 inches below the head. Hang the head upside down in a well-ventilated, dry space for 1–2 weeks to finish drying before removing seeds.
Once you master these three visual signs, you’ll never miss the perfect harvest window again. Happy gardening—and may your sunflower seeds bring you bountiful blooms next season!
How to harvest sunflower seeds without losing them to birds or weather
Once your sunflower heads show those telltale signs of readiness, the clock starts ticking. Birds and weather can turn a bountiful harvest into a scattered mess if you don’t act quickly.
The key is to time your cuts perfectly—cut too early, and seeds won’t be viable; wait too long, and they’ll shatter or rot. I’ve learned the hard way that harvesting on dry mornings makes all the difference, especially in humid climates where seeds spoil faster.
Start by cutting stems at a 45-degree angle, about 6 inches below the seed head. This prevents moisture from seeping into the cut end, which can cause rot. Use clean, sharp pruners or shears to avoid crushing stems—crushed stems trap moisture and invite mold.
I always wear gloves for this step; sunflower stems can be surprisingly prickly, and the seeds have a way of sticking to everything!
Step-by-Step Harvesting Guide
- Step 1: Cut stems at a 45-degree angle, 6 inches below the head, using clean pruners. Do this on a dry morning to minimize moisture exposure.
- Step 2: Hang heads upside down in a well-ventilated spot (garage, shed, or porch) using twine or string. Avoid direct sunlight to prevent overheating.
- Step 3: Let heads dry for 1-2 weeks until seeds rattle freely when shaken. Test by gently squeezing a seed—if it’s hard and dry, it’s ready.
- Step 4: Rub dried heads over a large tray or sheet to separate seeds. Discard chaff and damaged seeds immediately to prevent mold.
- Step 5: Store seeds in paper envelopes or breathable bags in a cool, dark place (like a pantry). Label with the harvest date—they’ll stay viable for 2-3 years if stored properly.
If you’re worried about birds stealing seeds, cover the heads with lightweight netting as soon as they start drying. I’ve had success with fine mesh netting tied loosely around the heads—it lets air circulate while keeping squirrels and birds at bay.
For extra protection, place a bird feeder nearby to distract them from your harvest.
Drying methods matter just as much as timing. While hanging heads upside down is the most traditional approach, I’ve also had luck using paper bags for smaller batches. Place the seed head in a brown paper bag, tie it off, and leave it in a dry, shaded spot.
The bag helps contain any seeds that might shatter prematurely. Just remember to check for pests daily—weevils love sunflower seeds, and a few can ruin a whole batch.
Proper storage is the final step to ensuring your seeds stay viable. Once fully dry, transfer seeds to paper envelopes or cloth bags—plastic traps moisture and leads to mold. I always label mine with the harvest year and variety, which helps me keep track of germination rates.
Store them in a cool, dark place, like a pantry or seed vault, where temperatures stay between 35-50°F. This keeps them fresh for up to 3 years, though germination rates drop after the first year.
With these steps, you’ll go from sunflower stems to stored seeds without losing a single one to birds or weather.
The satisfaction of watching those seeds sprout into new plants next season is worth every bit of effort—plus, you’ll have a stash of seeds to share with fellow gardeners or save for your next planting! 🌻